In Selenium WebDriver if you want to run test script using JUnit framework we have to add few JUnit Annotations in Selenium WebDriver Test script.
Below we are using few most commonly used JUnit annotations & execute our Selenium WebDriver Tests:
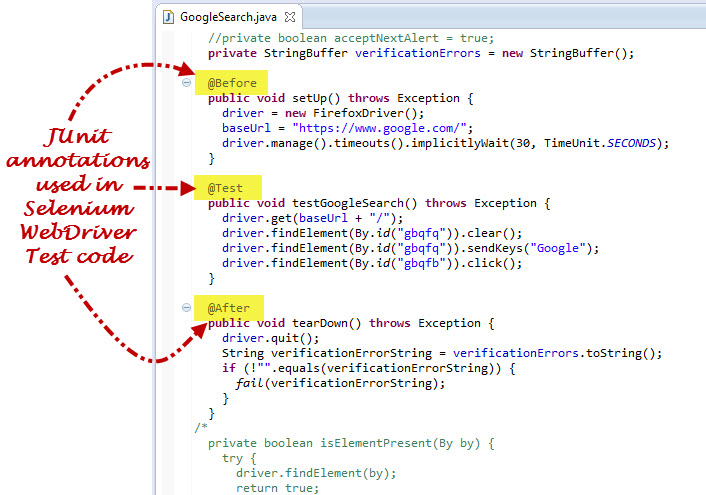
1) Once you open the above created Selenium WebDriver Test script and then check if have we used JUnit annotations in the code or not?

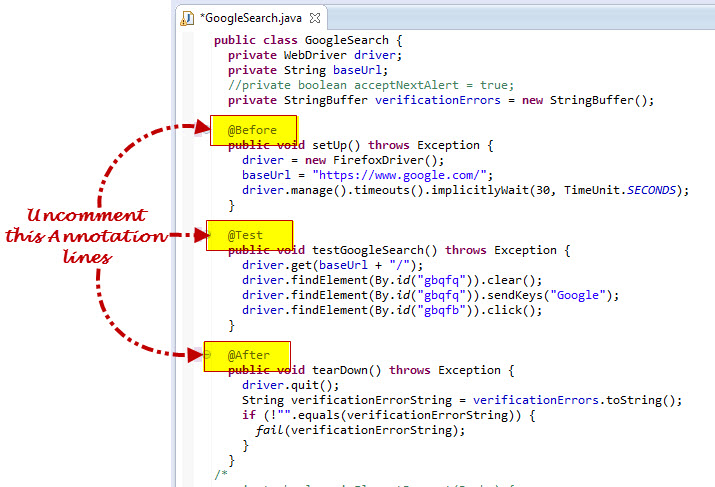
2) The highlighted part in above script is saying that we have used JUnit annotation in Selenium WebDriver code. In this script we have used @Before, @Test and @After annotations.
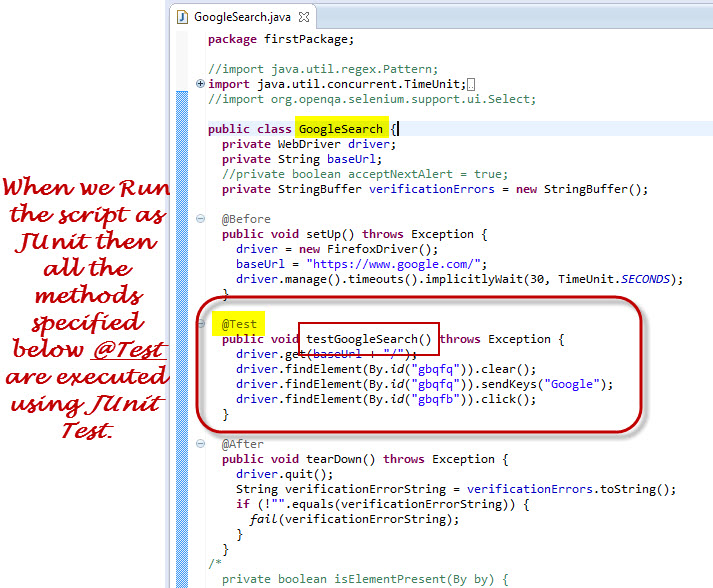
@Test
When we Run the script as JUnit then all the methods specified below @Test are executed using JUnit Test. As @Test JUnit annotation is specified before the testUntitled() method, this method will be executed when we run the “GoogleSearch” class using JUnit (i.e. Run As > JUnit Test)

@Before
All the methods are defined in the @Before are executed first & then method which are defined in @Test are executed. The primary use of this annotation is used to set up the test environment which is needed for executing the test. You can in below screen shot we have used setup() method in @Before.
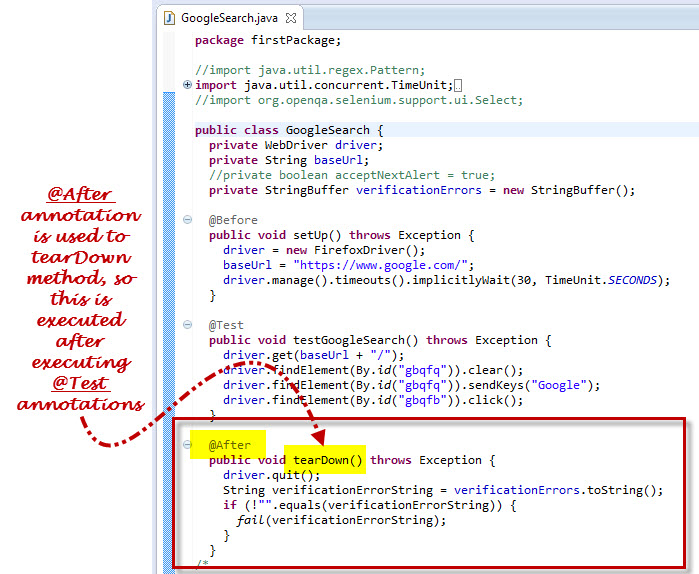
@After
All the methods are defined in the @Test annotation are executed first & then method which are defined in @After are executed. The primary use of this method is to do tear down i.e. deleting temporary data or setting up default values or cleaning up test environment etc.
Here @After annotation is specified before the ‘teardown()’ method. Hence this method will be executed by JUnit after executing all methods that are specified with @Test Annotation.

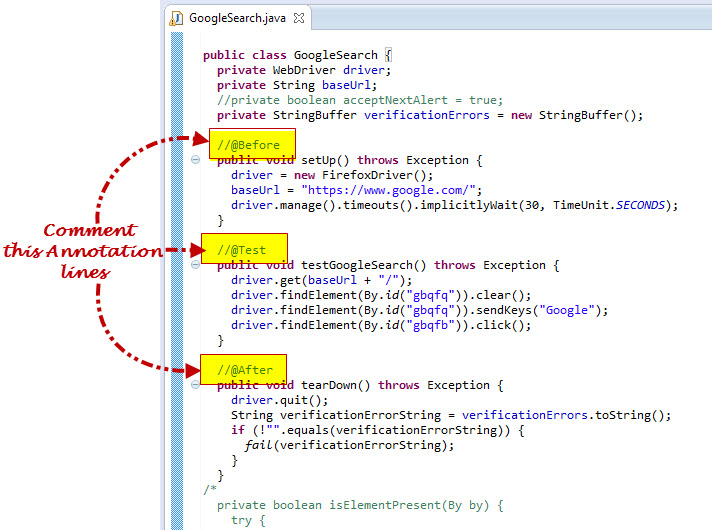
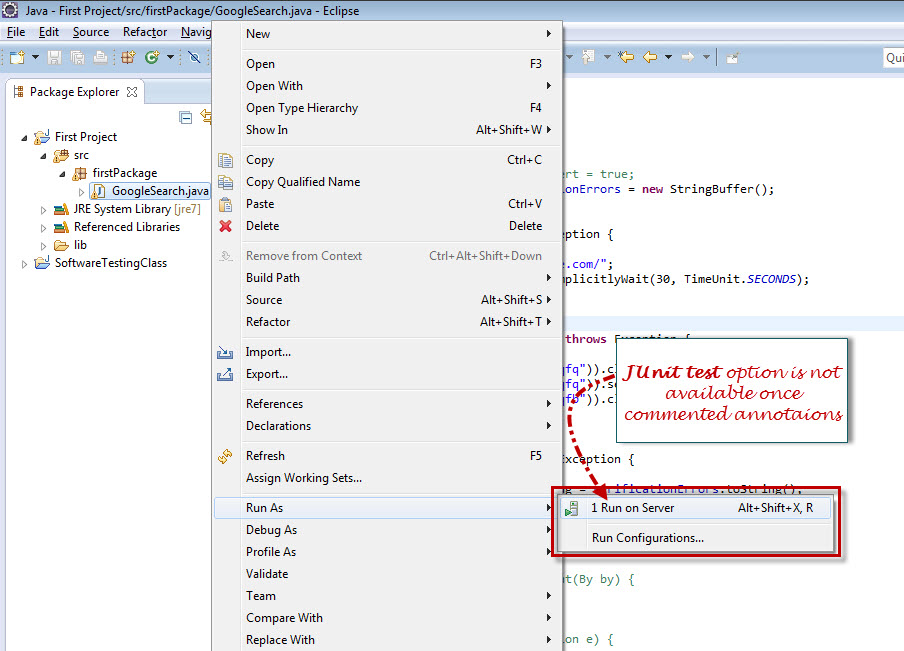
1. Comment all three Annotations line as shown in below screen shot. To comment line we have to add // before each line which we have to comment.

2. Run the Selenium WebDriver Test code with JUnit Test after commenting the annotations as shown below:

Now you understand if we are not using JUnit annotations in the Selenium WebDriver code then while running the code you cannot able to run the code as JUnit Test.
3. Now let’s uncomment annotations same as shown in below screen shot & check if you able to run the test using JUnit or not:

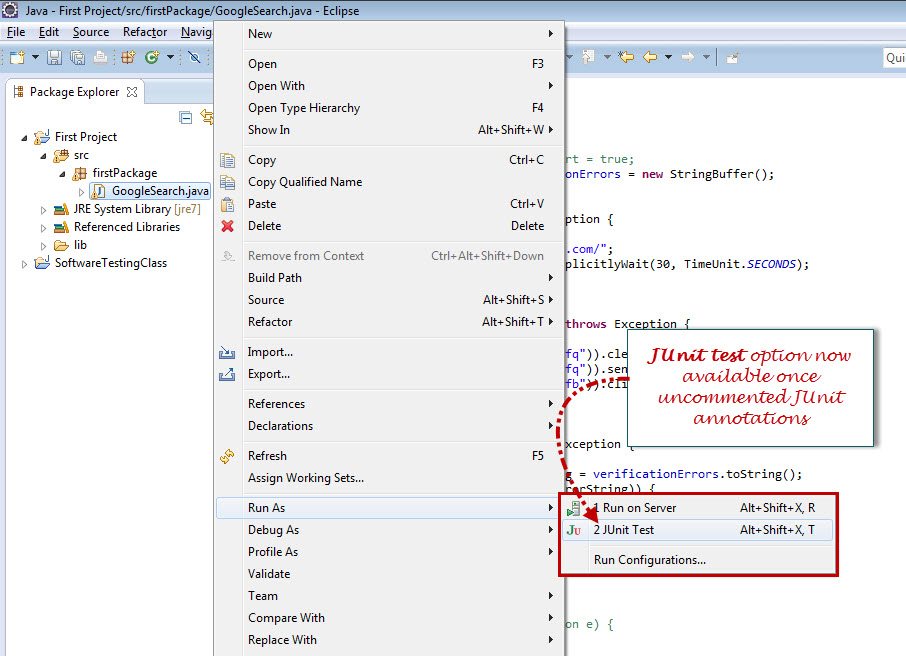
4. Have you notice that if we try to Run Selenium WebDriver code then the JUnit Test option is available as shown below:

So till now we have learned we can run the code using JUnit only if the JUnit annotations added in the code else Run As > JUnit Test option will not be available to Run the test.
Below we are using few most commonly used JUnit annotations & execute our Selenium WebDriver Tests:
- @Before
- @Test
- @After
1) Once you open the above created Selenium WebDriver Test script and then check if have we used JUnit annotations in the code or not?
2) The highlighted part in above script is saying that we have used JUnit annotation in Selenium WebDriver code. In this script we have used @Before, @Test and @After annotations.
@Test
When we Run the script as JUnit then all the methods specified below @Test are executed using JUnit Test. As @Test JUnit annotation is specified before the testUntitled() method, this method will be executed when we run the “GoogleSearch” class using JUnit (i.e. Run As > JUnit Test)
@Before
All the methods are defined in the @Before are executed first & then method which are defined in @Test are executed. The primary use of this annotation is used to set up the test environment which is needed for executing the test. You can in below screen shot we have used setup() method in @Before.
@After
All the methods are defined in the @Test annotation are executed first & then method which are defined in @After are executed. The primary use of this method is to do tear down i.e. deleting temporary data or setting up default values or cleaning up test environment etc.
Here @After annotation is specified before the ‘teardown()’ method. Hence this method will be executed by JUnit after executing all methods that are specified with @Test Annotation.
Run Selenium WebDriver Test Code without JUnit Annotaions:
Now let’s try to run Selenium WebDriver Test Code with commenting JUnit Annotaions & check if you are able execute test code as JUnit Test or not.1. Comment all three Annotations line as shown in below screen shot. To comment line we have to add // before each line which we have to comment.
2. Run the Selenium WebDriver Test code with JUnit Test after commenting the annotations as shown below:
Now you understand if we are not using JUnit annotations in the Selenium WebDriver code then while running the code you cannot able to run the code as JUnit Test.
3. Now let’s uncomment annotations same as shown in below screen shot & check if you able to run the test using JUnit or not:
4. Have you notice that if we try to Run Selenium WebDriver code then the JUnit Test option is available as shown below:
So till now we have learned we can run the code using JUnit only if the JUnit annotations added in the code else Run As > JUnit Test option will not be available to Run the test.
A good post..........
ReplyDelete