To create a project in Eclipse IDE, you have to follow some simple steps:
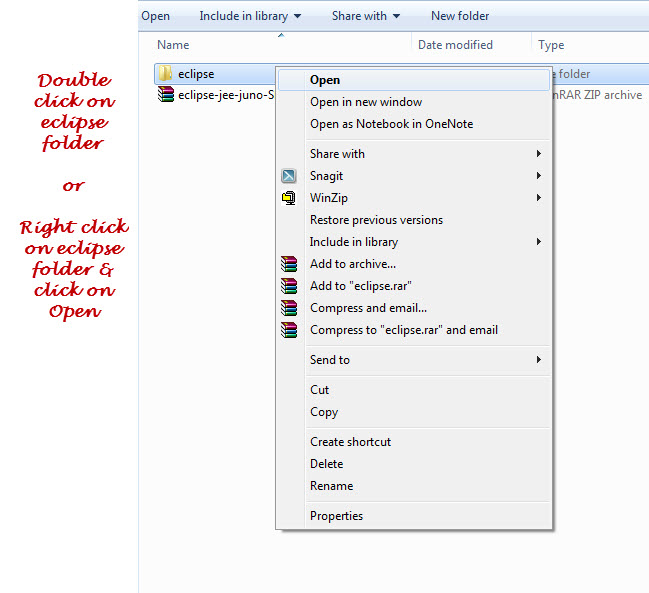
1) Navigate the extracted Eclipse software zip file showing in following screen shot (Download latest version of Eclipse here: http://www.eclipse.org/downloads/):

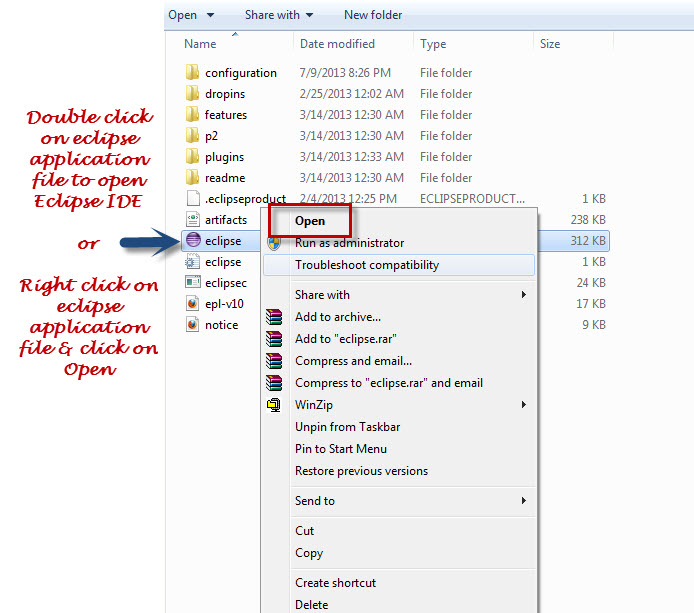
2) In the extracted Eclipse folder double click on the Eclipse Application file to launch the Eclipse application same as mention in the below screenshot:

Eclipse will take some time to launch the Eclipse welcome window, so wait for little time.
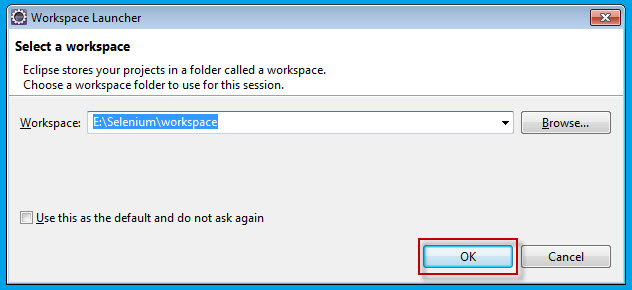
3) Eclipse will ask you to select the workspace, here you can select the path where you want to save Eclipse project. Once you enter the path click on OK button shown as mention below screen shot:

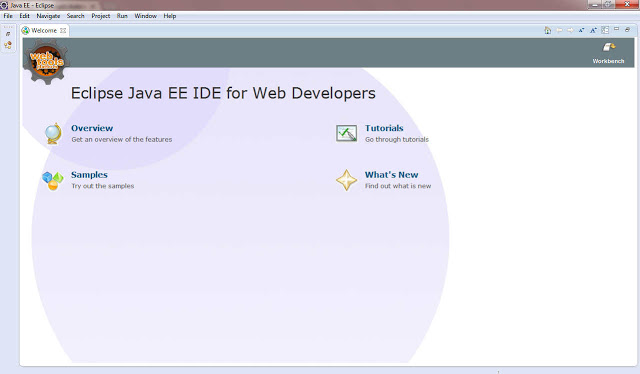
4) Eclipse will setup the workspace path & launch the Eclipse Welcome window first time as below, this means that eclipse ide is successfully installed on your machine.

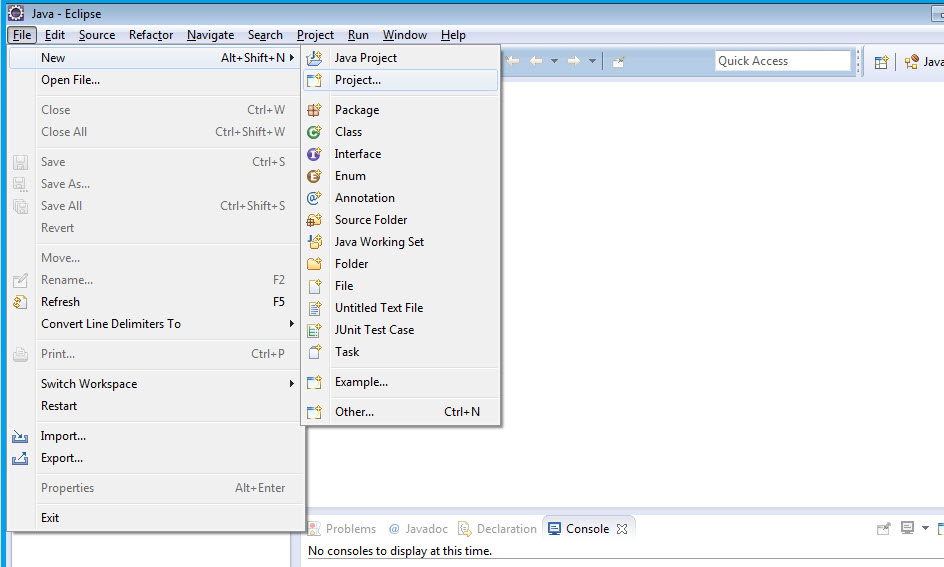
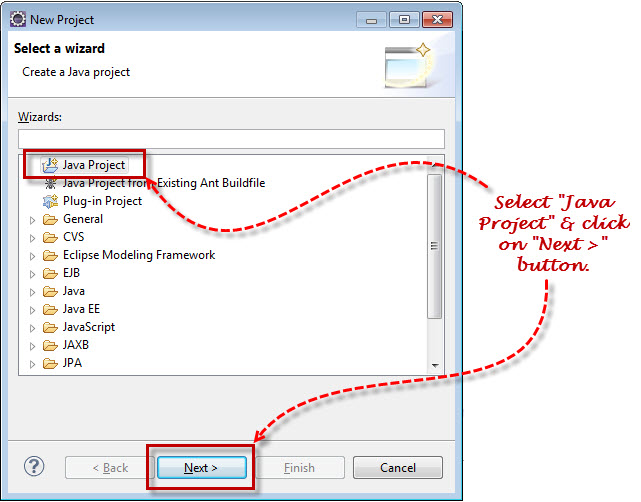
5) Go to File menu > New > Java Project.

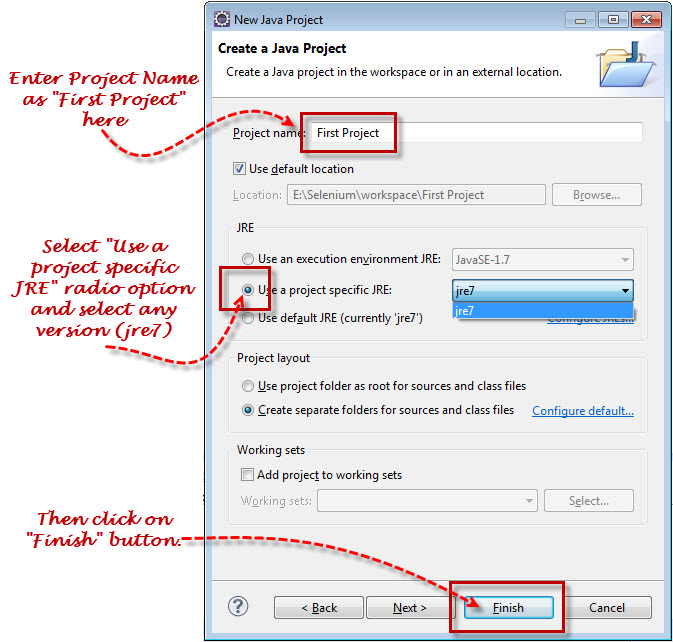
6) Enter Project Name as “First Project”:

In New Java Project window under JRE section select “Use Project specific JRE” radio option & select any value from the JRE version (here I am selecting ‘jre7’). Everytime you have to select the JRE version based on the project.
7) In New Java Project dialog click on Finish button.

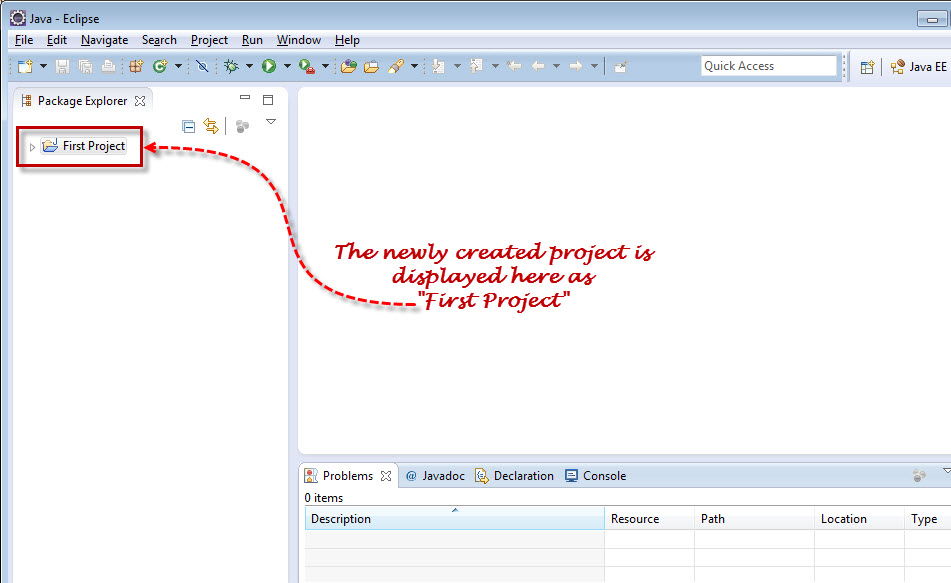
8) The new java project called “First Project” is created here & you can see the name of the project in the left section in the below screenshot:

1) Navigate the extracted Eclipse software zip file showing in following screen shot (Download latest version of Eclipse here: http://www.eclipse.org/downloads/):
2) In the extracted Eclipse folder double click on the Eclipse Application file to launch the Eclipse application same as mention in the below screenshot:
Eclipse will take some time to launch the Eclipse welcome window, so wait for little time.
3) Eclipse will ask you to select the workspace, here you can select the path where you want to save Eclipse project. Once you enter the path click on OK button shown as mention below screen shot:
4) Eclipse will setup the workspace path & launch the Eclipse Welcome window first time as below, this means that eclipse ide is successfully installed on your machine.
5) Go to File menu > New > Java Project.
6) Enter Project Name as “First Project”:
In New Java Project window under JRE section select “Use Project specific JRE” radio option & select any value from the JRE version (here I am selecting ‘jre7’). Everytime you have to select the JRE version based on the project.
7) In New Java Project dialog click on Finish button.
8) The new java project called “First Project” is created here & you can see the name of the project in the left section in the below screenshot:
No comments:
Post a Comment