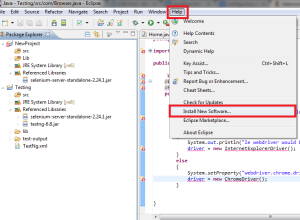
I am supposing that you are familiar how to add jar files to your project and How to add any class, folder and xml.
Most of the time we find it hard to do compatibility testing of
certain web-page on various Browsers and it takes a big chunk of time
for its execution on various set of Browser and also on various instance
of Browser.
Testng has provided us an option through its Parameter feature,
through which we could run same test script written in WebDriver
parallel to all our installed Browser on our system.
Scripts and Steps to execute Script
1- Go to your Eclipse Project –> Right Click on Project –>
Click On New–> others–> Pop up would appear–> Click on XML
–> Select XML File –> Click on Next –> New XML File pop up
would appear–> Enter the name of XML and click on Finish
2- Your XML file would appear like this
<!–?xml version=”1.0″ encoding=”UTF-8″?>–>
Replace this with this code
<
suite name=”Suite1″ verbose=”1″
parallel=”tests”>
<
test name=”Generic test” >
<
parameter name=”browser” value=”FF”></parameter>
<classes>
<
class name=”com.testng.Test” />
</classes>
</test>
<test name=”Generic test_ie” >
<parameter name=”browser” value=”IE”></parameter>
<classes>
<class name=”com.testng.Test” />
</classes>
</test>
<!–suite>–>
Download xml file from
here
Now understand the tags of XML that I have marked Bold in XML file
Parallel: this is being used to run tests parallely in different browser
suite name: This is the name of your test suit
test name : kind of test cases (you may give name like
this Regression, Sanity,Smoke, or any thing that make you to make better
test execution ) like i have given name to this test case as Generic
test
Classes: name of class that you want to add in this test execution
Most important one is
<
parameter name=”browser”
value=”FF”></parameter> Here I have browser as parameter name(u
can have any name to it) and Value here I have given FF for Firefox,IE
for Internet Explorer, and Chrome for Chrome Browser.
3- Now its time to understand how we have to use parameter name in
Java program. Since parameter is defined for Browsers. Since we are
trying to use Testng framework we would write two function first one to
launch Browser and Second one to close Browser
Create new java class in your Java Project
Steps to create new java class::
right click on project ||New|| Click on Class||Enter the name of class and Hit on finish.
Name of my java class is
Browser.java
package com.testng;
import org.openqa.selenium.WebDriver;
import org.openqa.selenium.chrome.ChromeDriver;
import org.openqa.selenium.firefox.FirefoxDriver;
import org.openqa.selenium.ie.InternetExplorerDriver;
import org.testng.annotations.AfterMethod;
import org.testng.annotations.Parameters;
//import org.testng.annotations.AfterTest;
import org.testng.annotations.BeforeMethod;
public class Browser {
WebDriver driver;
@BeforeMethod
/* The annotated method will be run before all tests in this suite have run */
//browser is the name of parameter that we have used in xml
@Parameters(“browser”)
/* this annotation is used to insert parameter in test*/
public void openBroswer(String browser){
/*Comparing the value of parameter name if this is FF then It would launch Firefox and script that would run is as follows */
if(browser.equalsIgnoreCase(“FF”))
{
System.out.println(“Firefox driver would be used”);
driver = new FirefoxDriver();
}
else
{
System.out.println(“Ie webdriver would be used”);
driver = new InternetExplorerDriver();
}
}
@AfterMethod
/* this annotation would run once test script execution would complete*/
public void closeBrowser()
{try{
driver.wait(15000);
}
catch(Exception e){}
driver.close();
driver.quit();
}
}
4- Since we have created Browser class in which we have used the
parameter defined in XML, Now we should create one more class that is
our Test class, This class would inherit Browser class for launching
Browser before executing scripts under @Test annotation and for Closing
Browser once execution of scipt under @Test annotation get completed.
here I have given the name of this class is Test
package com.testng;
import org.openqa.selenium.By;
import org.testng.Reporter;
import org.testng.annotations.Test;
@Test
public class Test extends Browser{
public void test(){
/* in this test we are searching selenium in Google and clicking on first link in Google Result*/
driver.get(“http://www.google.com”);
driver.findElement(By.id(“gbqfq”)).sendKeys(“selenium”);
//driver.manage().timeouts().implicitlyWait(15, TimeUnit.SECONDS);
try {
Thread.sleep(5000);
} catch (InterruptedException e) {
// TODO Auto-generated catch block
e.printStackTrace();
}
driver.findElement(By.xpath(“//ol[@id='rso']/li[1]//h3/a”)).click();
try {
Thread.sleep(5000);
} catch (InterruptedException e) {
// TODO Auto-generated catch block
e.printStackTrace();
}
}
}
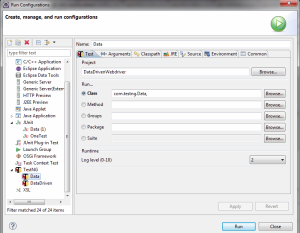
5- Now its time to execute Test-Case
Steps:
Right Click on Test.java file and –> Run As –> Run
Confinguration –> In pop up Go Testng –> Right Click on Testng and
Click on New –> Give name to your Run Configuration, Browser Class
and select your Xml just by Browsing in front of Suit –> hit on
Finish and this would run your test



 Assertion tool class is a part of org.testng and extends java.lang.Object
class. This class presents a wide variety of static methods with a
specific parameter order. To name a few, there are methods like assertTrue(condition), assertFalse(condition), assertEquals(actualValue, ExpectedValue), assertNull(object) and many more.


