Please follow following simple steps to Install TestNG in Eclipse. We
have installed Eclipse in few days back, if you don’t have eclipse then
please get installed using post: “Link”
2) Install dialog box will be appeared same as below:

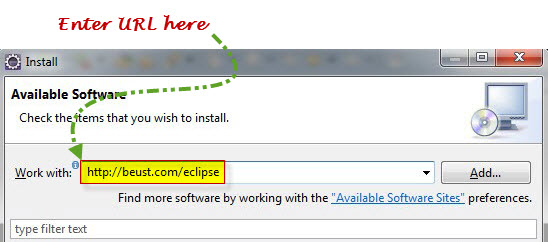
3) In the install dialog box, enter URL as “http://beust.com/eclipse” in Work with text box & press keyboard enter key.
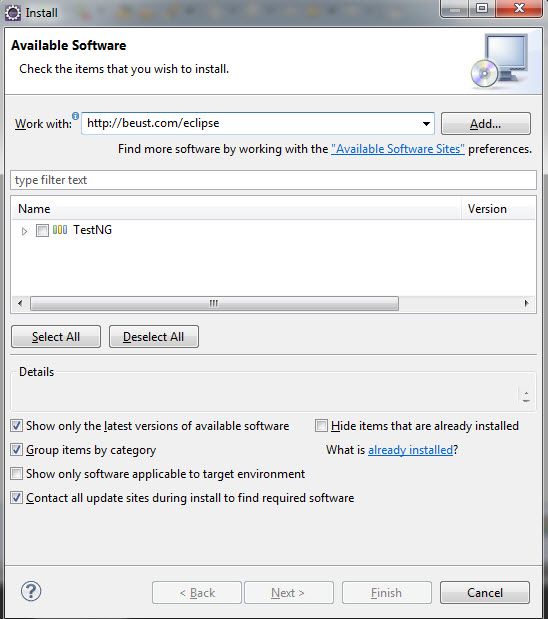
4) Under Name column TestNG check box will be displayed same as below:
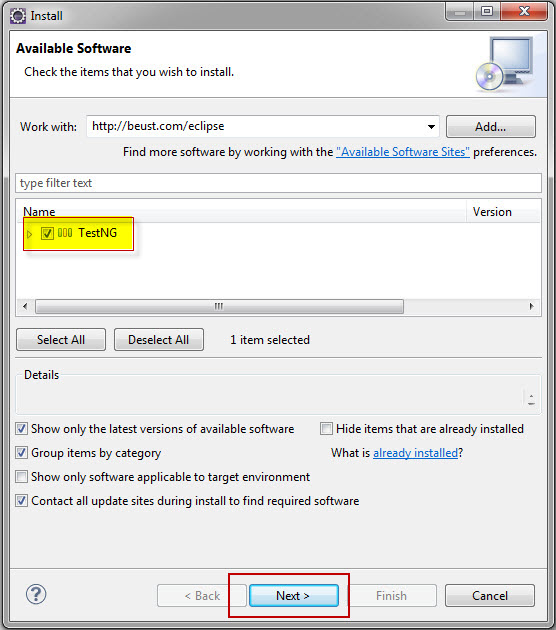
5) Select the “TestNG” check box & click on Next button.
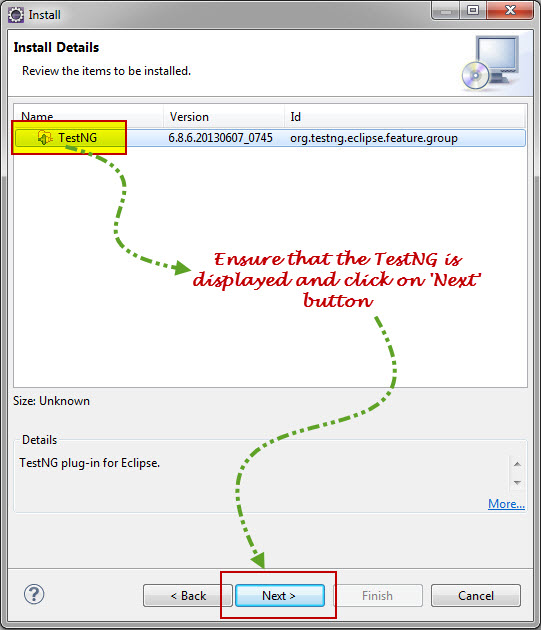
6) On Install Details screen, make sure that TestNG is selected & then click on Next button same as mentioned below screenshot:
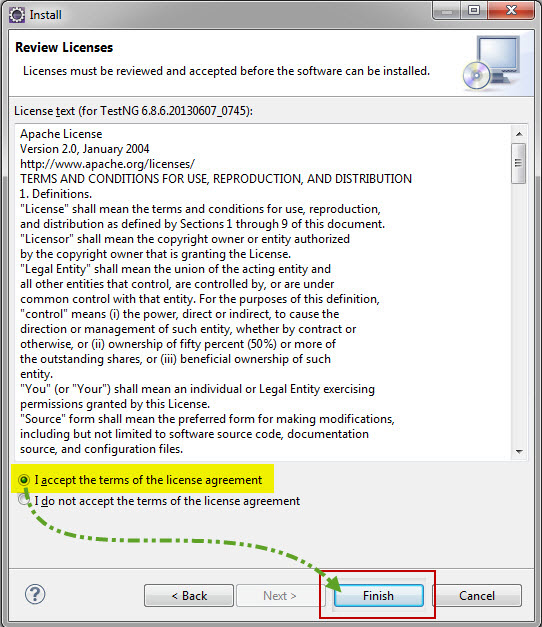
7) On Review Licenses screen read license agreement & select “I accept…” option shown in below screen shot & click on Finish button.
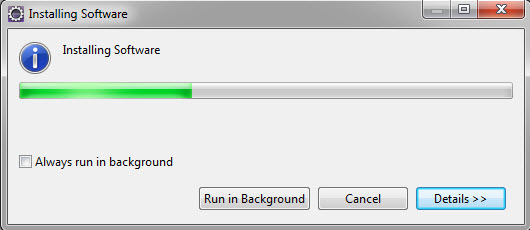
8) Ensure that Installing Software dialog appear. Wait till installation gets completed:
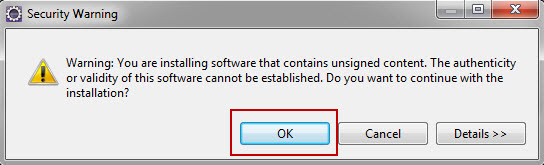
9) One security warning message will appear during installation. Ensure that you click on Ok button if same security dialog is appeared.
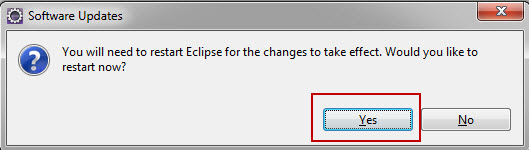
10) Once the installation process is completed then Eclipse ask you to Restart, click on Yes button.
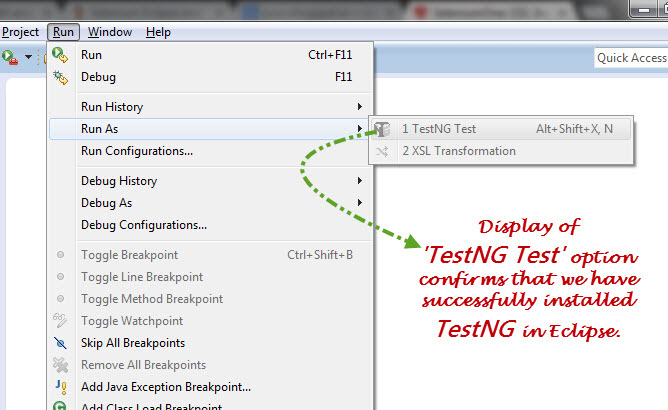
11) Once the Eclipse is restarted, to make sure whether TestNG is installed or not. Just under Run menu click on “Run As” option & check new option is added called “TestNG Test”same as below screen shot:
Conclusion:
TestNG is really impressive framework where we can execute the simple to complex test scripts with ease. It supports many powerful features, like annotations, reporting, data-driven testing etc.
Steps to install TestNG in Eclipse IDE:
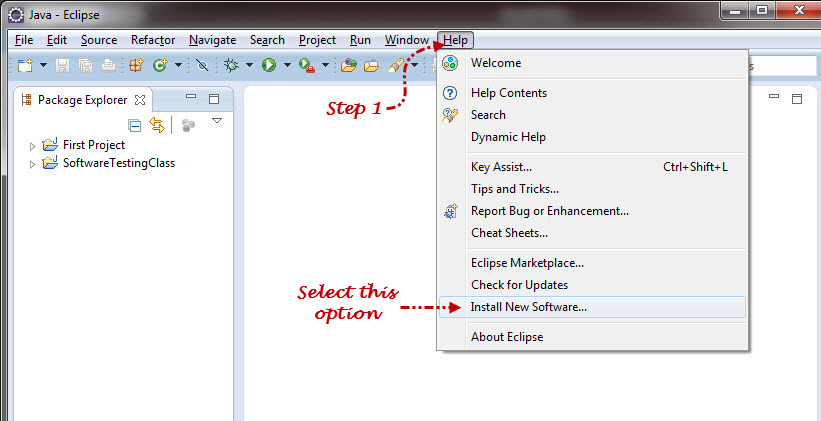
1) Launch Eclipse IDE & under Help menu click on “Install New Software” option.2) Install dialog box will be appeared same as below:
3) In the install dialog box, enter URL as “http://beust.com/eclipse” in Work with text box & press keyboard enter key.
4) Under Name column TestNG check box will be displayed same as below:
5) Select the “TestNG” check box & click on Next button.
6) On Install Details screen, make sure that TestNG is selected & then click on Next button same as mentioned below screenshot:
7) On Review Licenses screen read license agreement & select “I accept…” option shown in below screen shot & click on Finish button.
8) Ensure that Installing Software dialog appear. Wait till installation gets completed:
9) One security warning message will appear during installation. Ensure that you click on Ok button if same security dialog is appeared.
10) Once the installation process is completed then Eclipse ask you to Restart, click on Yes button.
11) Once the Eclipse is restarted, to make sure whether TestNG is installed or not. Just under Run menu click on “Run As” option & check new option is added called “TestNG Test”same as below screen shot:
Conclusion:
TestNG is really impressive framework where we can execute the simple to complex test scripts with ease. It supports many powerful features, like annotations, reporting, data-driven testing etc.
No comments:
Post a Comment